どうも音無サノトです(^^)
週末のゲーム制作の続きになりまーす。
今日は前回 追加した障害物の衝突判定をやります(`・ω・´)
otonasisanoto.hatenablog.com
のんびりいきましょう。
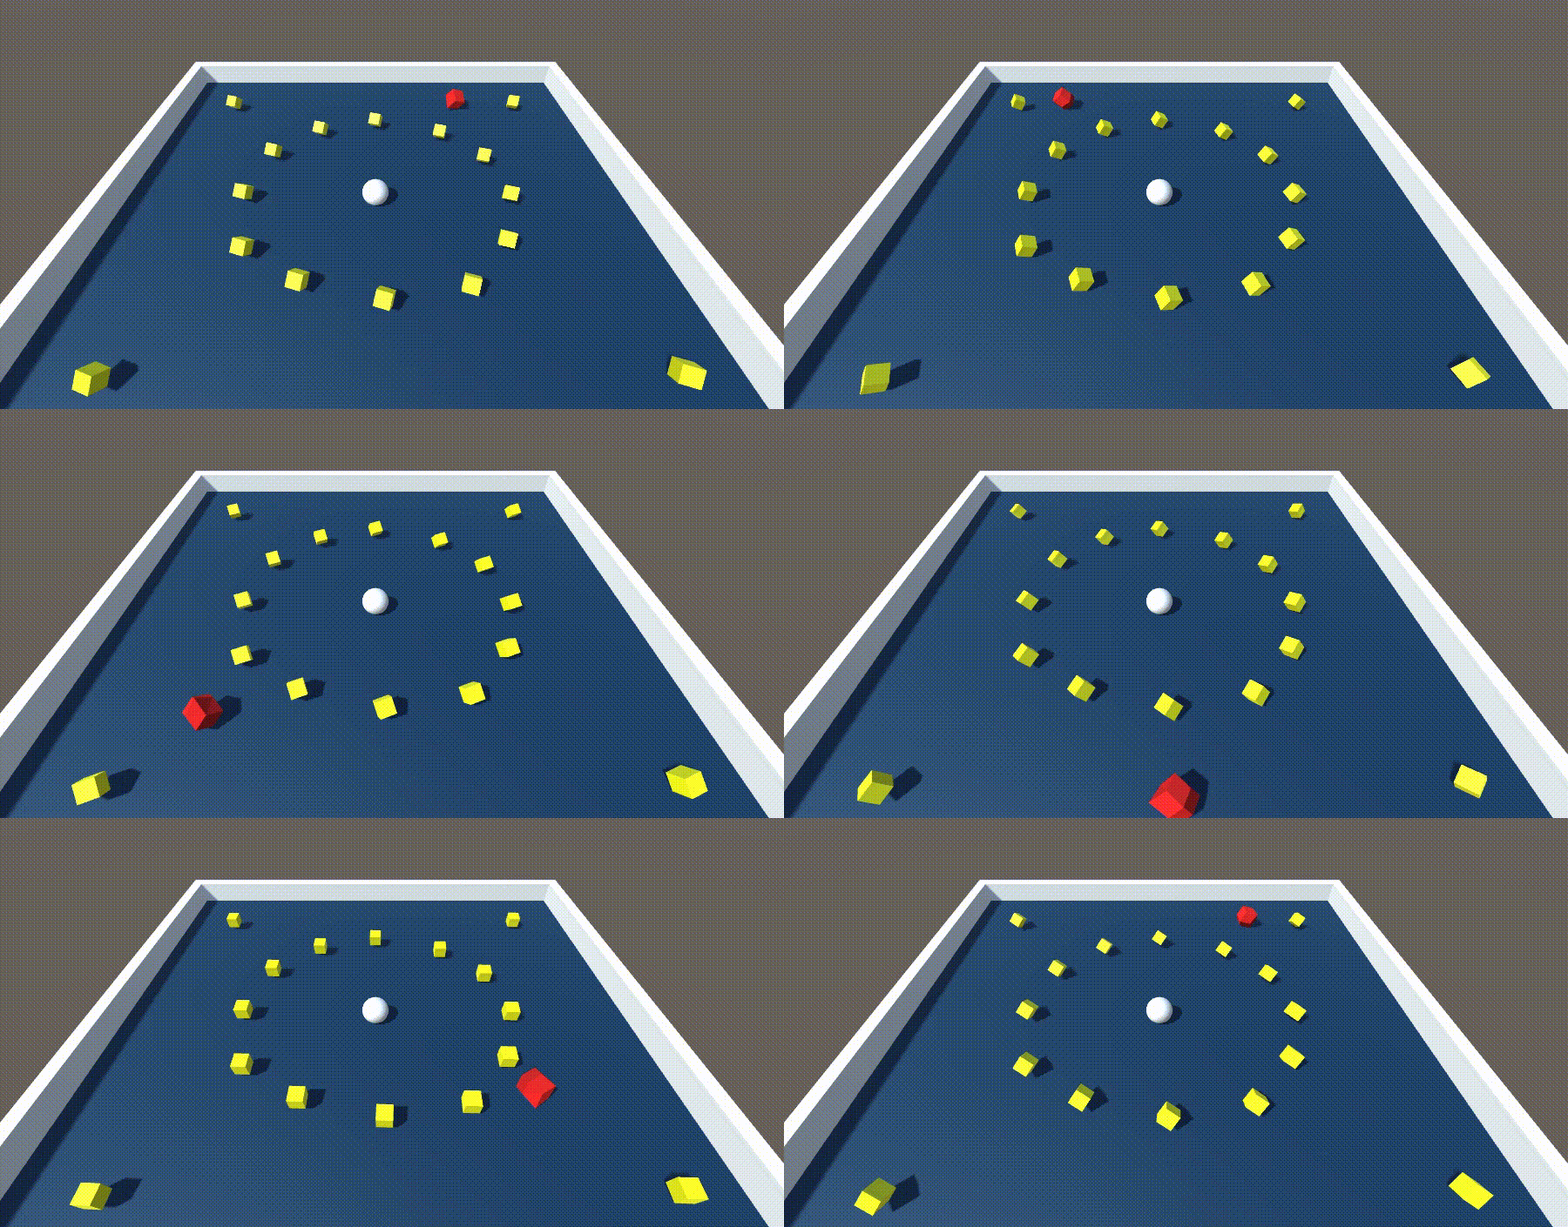
障害物を回転させる
障害物の衝突判定をする前に、ただ4隅を回すだけでは物足りない感じがするので、障害物自体も回転させます。
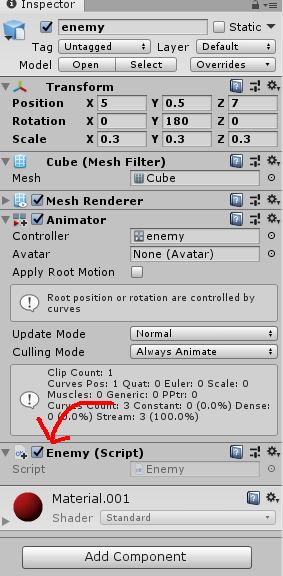
スクリプト を追加して、名前を「Enemy」にします。
スクリプト の追加
次のように処理を変更します。
アイテムを回転させたときと同じような処理にします。
アイテムより速く回転させたかったのでスピードをコントロール する変数を追加しています。
using System.Collections;
using System.Collections.Generic;
using UnityEngine;
public class Enemy : MonoBehaviour
{
public float speed;
void Update()
{
transform.Rotate(new Vector3(15 , 30 , 45 ) * Time.deltaTime * speed);
}
}
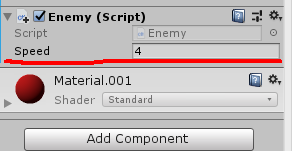
Speed を4くらいにします。
スピードの変更
障害物の衝突判定
それでは障害物の衝突判定を実装します。
まずは衝突した際に表示するテキストを用意しましょう。
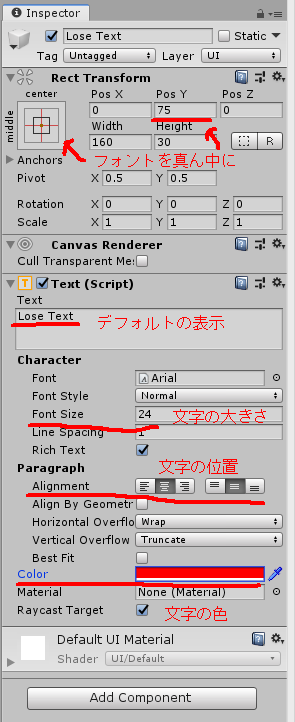
Hierarchy ウィンドウから Create > UI > Text でテキストを追加して、名前を「Lose Text」にします。
それからテキストを下記のように変更。
Lose Text の変更
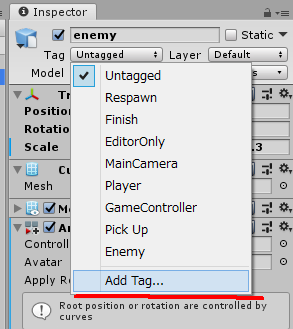
それから Enemy タグを追加して Enemy オブジェクトのタグを変更します。
Enemy の Inspector ウィンドウより、名前の下にある Tag をクリックして Add Tag... を選択します。
タグの追加
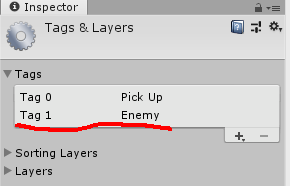
Tags の下にある「+」アイコンをクリックして Enemy タグを作成します。
Enemy タグの追加
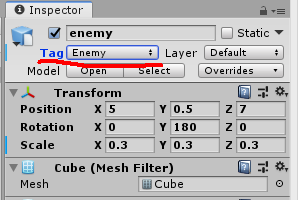
Enemy のタグを変更します。
Enemy のタグを変更
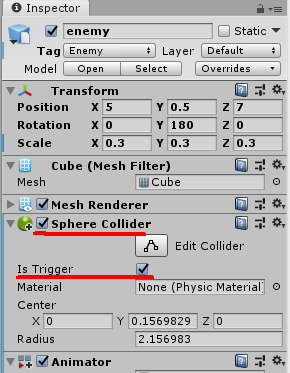
それから衝突判定に使用する Collider も追加します。
Inspector ウィンドウの下にある Add Componet から Physics > Sphere Collider を選択します。
Is Trigger にチェックも入れておきましょう。
Collider の追加
これで準備完了です。
PlayerContoller の処理を変更します。コメント部分が今回 追加した処理です。
using System.Collections;
using System.Collections.Generic;
using UnityEngine;
using UnityEngine.UI;
public class PlayerContoller : MonoBehaviour
{
public float speed;
public Text countText;
public Text winText;
public Text loseText;
private Rigidbody rb;
private int count;
private int PickUpNum;
void Start()
{
rb = GetComponent<Rigidbody>();
count = 0 ;
SetCountText();
winText.text = "" ;
loseText.text = "" ;
PickUpNum = GameObject.Find("Pick Ups" ).transform.childCount;
}
void FixedUpdate()
{
float moveHorizontal = Input.GetAxis("Horizontal" );
float moveVertical = Input.GetAxis("Vertical" );
Vector3 movement = new Vector3(moveHorizontal, 0.0f , moveVertical);
rb.AddForce(movement * speed);
}
void OnTriggerEnter(Collider other)
{
if (other.gameObject.CompareTag("Pick Up" ))
{
other.gameObject.SetActive(false );
count = count + 1 ;
SetCountText();
}
if (other.gameObject.CompareTag("Enemy" ))
{
loseText.text = "You Lose!" ;
}
}
void SetCountText()
{
countText.text = "Count : " + count.ToString();
if (count >= PickUpNum)
{
winText.text = "You Win!" ;
}
}
}
テキストを格納する変数を用意して、初期化し、衝突時に表示するように変更しただけです。とっても簡単(^^♪
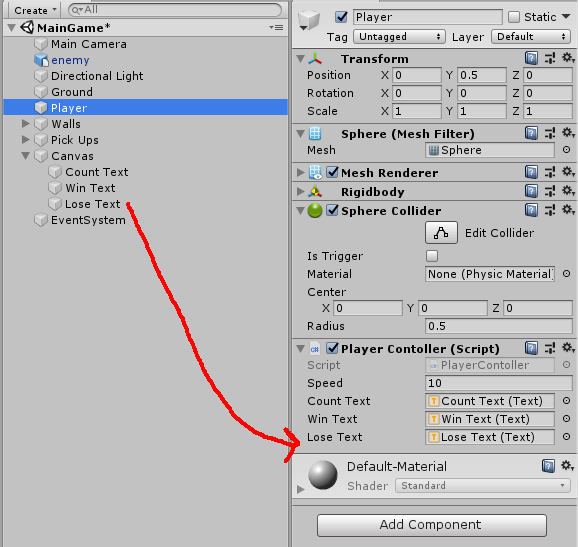
最後に Player に Lose Text をアタッチします。
Player にテキストをアタッチする
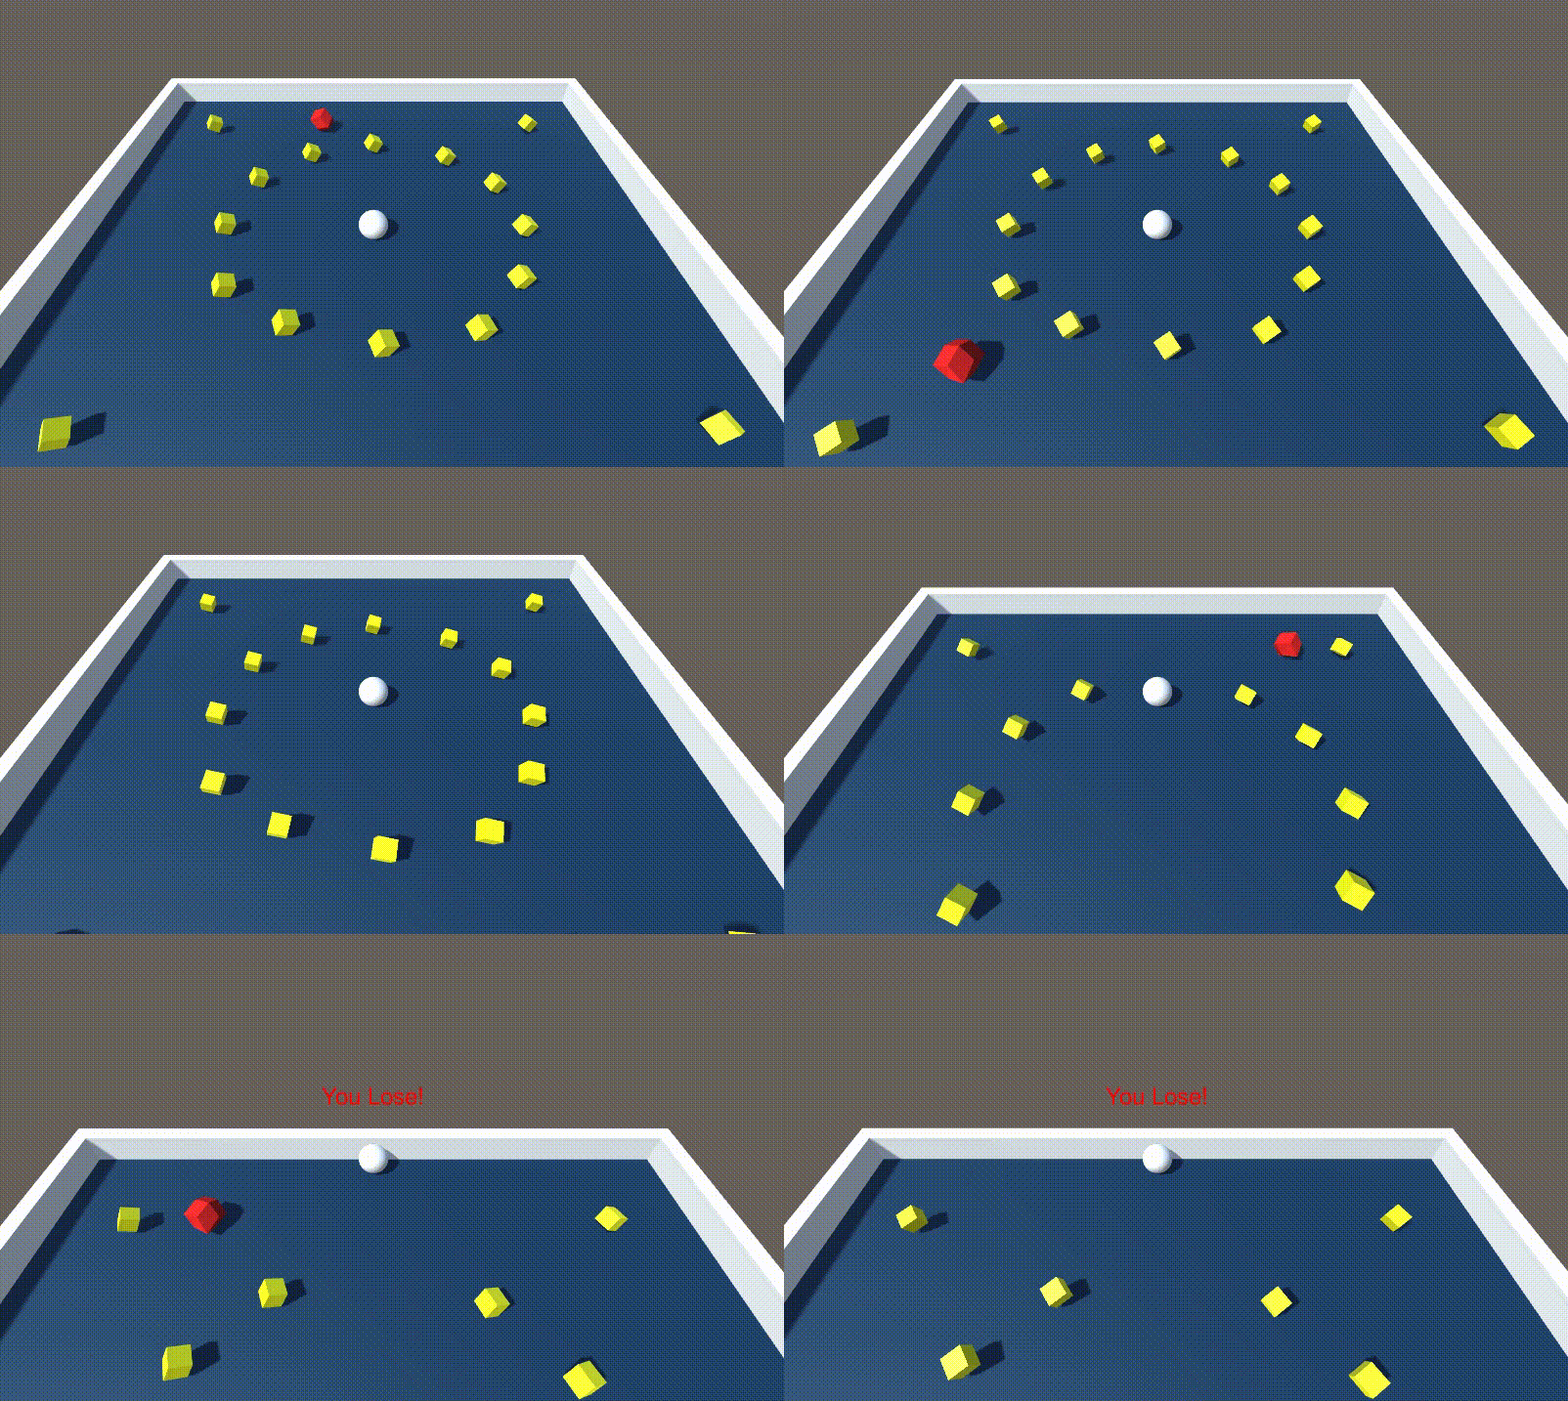
それでは再生してみましょう。
OK ですね(わーい)
次回は DAW ソフトを使って BGM の作成をしていきたいと思います。
本日は以上となります。最後まで読んでいただきありがとうございました!
